The completion of all the shell inlaying on the guitar. The pearly lady now only requires some minor engraving touch-up, particularly around the neck. Then final fine sanding before coating and polishing.

Two halves of rosewood bookmatched and joined down the centre to form the back

Inside of back showing the spruce bracing and centre join strip.

View showing the slight arch across the back

Inlaying the paua pieces to form the decorative rosesette around the soundhole position

Top made from two halves of bookmatched spruce joinded along the middle


Origin of the Paua pieces that have to be cut from a shell

Showing bending of side wood around a pipe heated by a paint stripper gun

Bent bookmatched halves of rosewood in mould to form the sides


Gluing in the bottom block

Gluing in the heel block

Trimming the sides down to the correct height

Using a finger plane to shave sides down to accurate height

Sides removed from mould with neck block and tail block glued in. Note recess in heel block to take neck tenon joint.

Top Side being sanded on a sanding board to ensure a level edge.

Pre-purchased Kerf Linings prior to gluing in place
Gluing kerf linings along top edge. Clamped in place with pegs. To provide support for top

Completed 'Kerfing' lining now in place which once levelled of will be ready to provide gluing edge for top and bottom plates

Flat sanding board on the back surface highlighting the curvature (arch) that has been cut and sanded into the back to give it a curved finish.

Marking out bracing pattern on underside of soundboard (top)

Cutting the Paua Shell to rough shape segments with a fine jewellers's saw


Shaping the shell segment to a radius of the soundhole rosette. The camera has stopped the sanding disc which is spinning at high speed...good for trimming finger nails!

Paua segments laid out before colour matcching and glueing into the centre recessed grove of the rosette

Glued in paua segments waiting to be sanded smooth and flush with sound board

Sanding flush the paua inlay. There is a gap in the paua circle at the top which does not matter as this will be hidden beneath the fingerboard. The rough sanding is carried out with 80grit sandpaper. Eventually it will be smoothed down to 400grit, then polished and coated with laquer to give a radient finish.

Soundhole circle cutter made from iceblock stick and utility knife blade

Underside of soundboard about to be braced. The first reinforcing positioned is the bridge plate. This sits directly under the bridge where the strings are attached to the soundboard. This adds reinforcing to this area which is under much stress.

Gluing the finger braces to the underside of the soundboard. These distribute the sound vibrations from the bridge plate and main cross braces (yet to be glued in place)

Shaping the braces with a chisel to a pyrimid shape. Every piece of wood is different so this means the shaping of the braces is individual to each guitar to give optimum sound. this can not be done by a machine but must be done by hand and the final shape, size and position of the braces will have a large contribution to the sound of the guitar.

Preparing lap joint of the x-cross brace. This must be an accurate snug fitting joint.

Joined x-cross brace tested for fit. Must still be shaped and finished with sanding. The bottom of the cross braces will be sanded with a slight curve. This will impart a shallow raised dish curve in the soundboard.

Clamping the lower face brace whilst glueing. As with all braces this will require shaping after it has been glued.

Completed bracing. Now only needs finish sanding and tidying up. The bracing is un-symmetrical as one side of the soundboard is Base, whilst the other side is Treble.

Dry practice run with spool clamps holding sides down onto soundboard before trying procedure with glue.

Sides and soundboard now glued together

The edge before applying the binding (purfing)

The shadow under the straightedge shows that the soundboard (top) has a slight curve down towards the edge. This is built in on purpose all the way around the guitar by putting a slight curve in the braces.

Ebony blank from which the fingerboard will be made. Mahogany blank from which the neck will be made. Fret wire from which the frets will be cut.

Signing guitar on underside of soundboard before gluing on back.

Gluing on back using spool clamps.

Back now glued onto sides. Still requires edge binding for added edge protection and decoration.


Neck Blank cut to thickness from the larger blank.

Head scarf jointed to neck. This joint will be further strengthened with addition of head veneer.


Routing the binding ledge along the bottom edge

The finished binding ledge with a sample of the unbent ebony binding.

Masking tape holding the bent ebony binding in position whilst the glue is drying

The glued in binding, ready for sanding and rounding of.

The cut-out mortise slot to take the neck tenon. Note the hole through to the inside of the body at the top of the cavity. This is to allow access to the truss rod from the guitar sound hole to allow adjustment.


Rough sawn neck tenon.

An original ebony block on the left, and the sized block planed and sanded ready for shaping on the right.

The neck with truss rod glued in and the headstock veneer glued in place.

The headstock marked out ready for drilling the tuning peg holes.

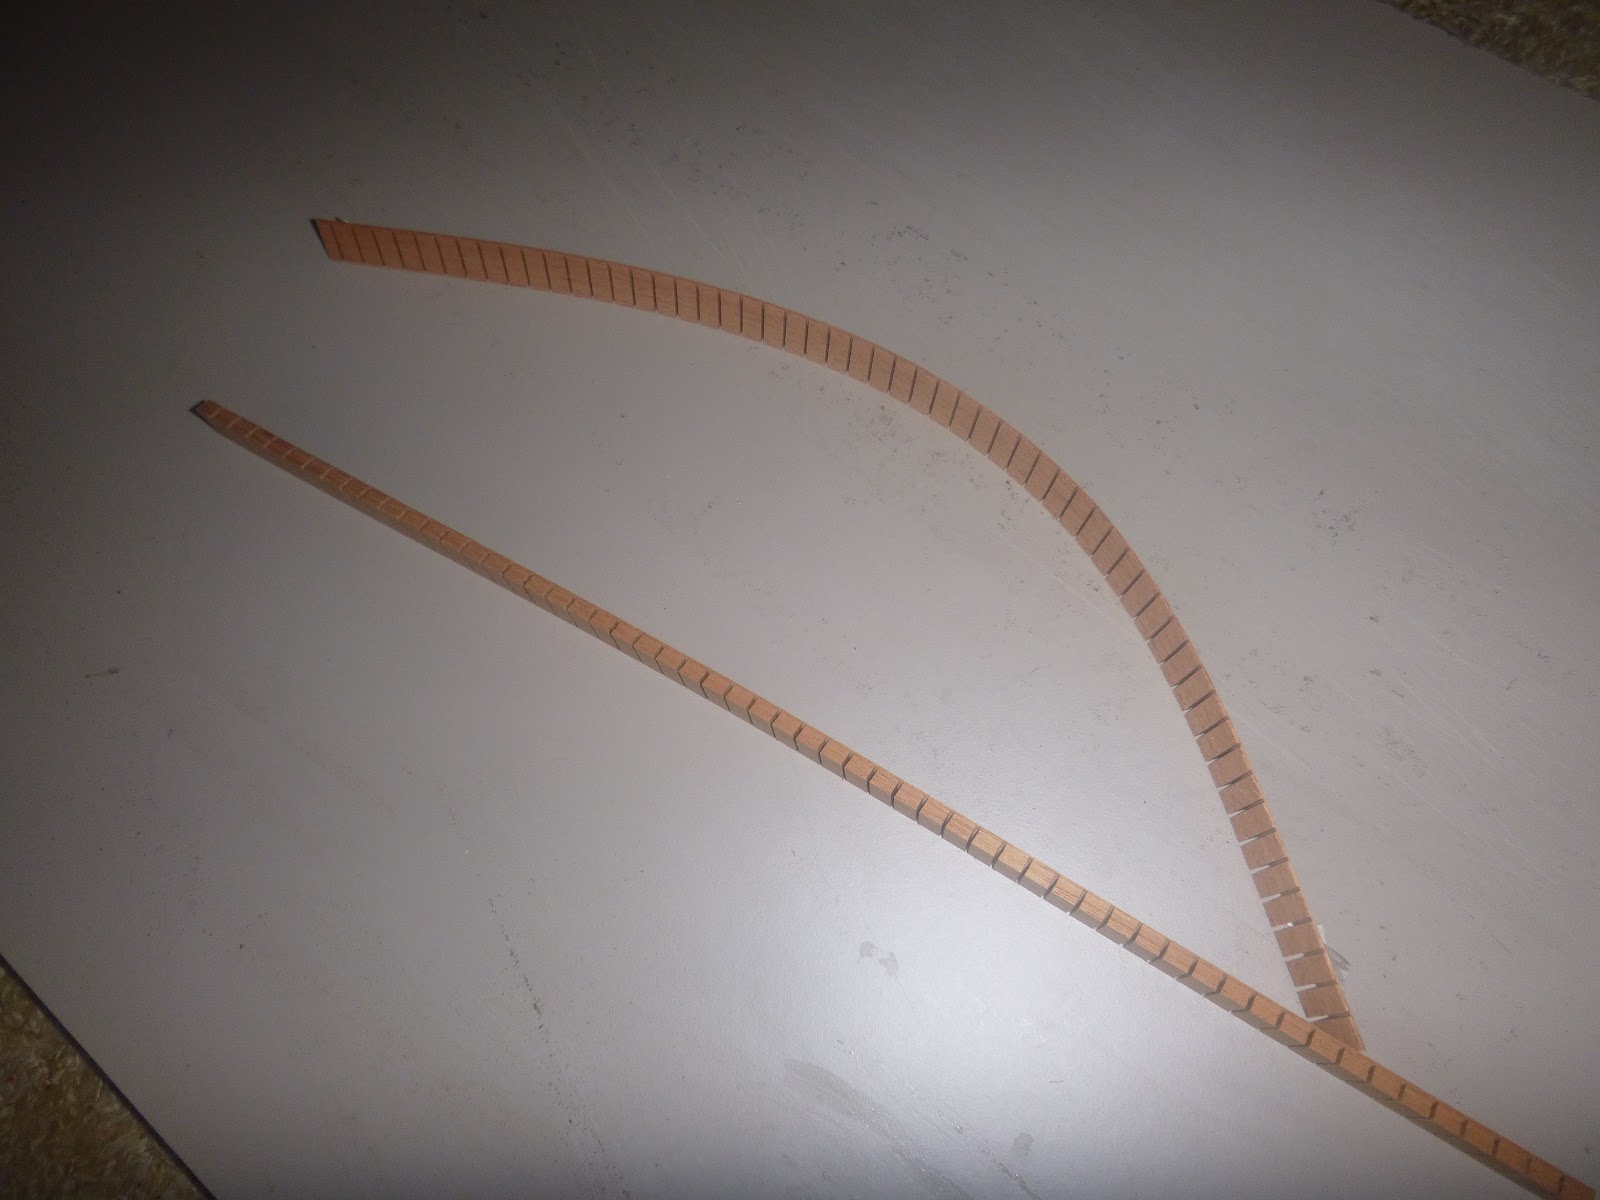
Sawing the slots for the fret wire. Note the saw has a plate on it to act as a depth stop so as not to saw the slots too deep.

The fingerboard with all slots cut and tapered to final width

Gluing the fingerboard onto the neck

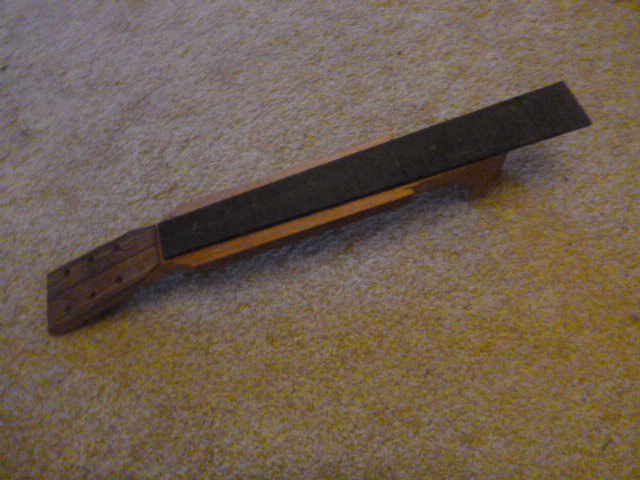
The oversize unshaped neck with the fingerboard glued in place.
Sanding the arch surface into the ebony fingerboard.

This shows the curve in the underside of the sanding block used to sand the fingerboard.

Holes drilled in the fingerboard for the paua or mother of pearl (yet to be decided) inlay for the fret position marker dots.

The bridge blank with holes drilled for the string pins

Routering out the saddle slot in the bridge blank. The bridge blank is held in place on the board with double sided sellotape.

Bridge blank with saddle slot completed

The bridge roughly shaped now ready for final sanding and polishing

Piece of paua shell glued with super glue onto end of drill bit. The drill bit is the size that was used to drill the holes. Consequently when the paua is shaped to the drill size (diameter) it should be a perfect fit in the drilled hole.

Close up of the piece of paua shell.

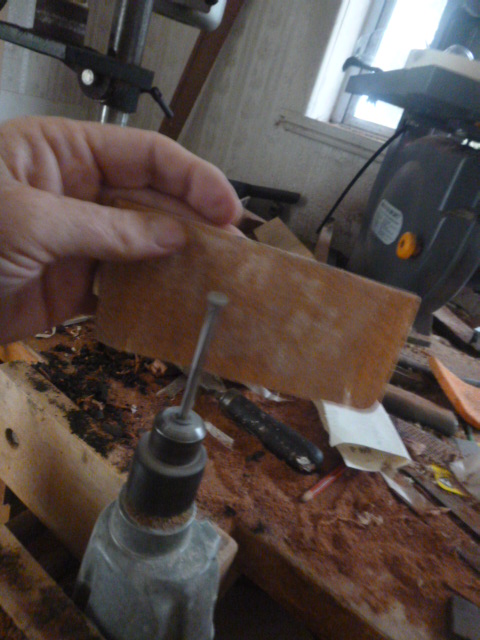
Sanding the paua to the diameter of the drill bit as it is spinning fast in the electric drill
The shaped paua fret dot still glued to the drill end.

The shaped fret dot removed from the drill end ready to be glued into the fret marker hole

The fingerboard with fret marker dots installed. Note the excess neck wood which is still to be shaped.

After the ebony binding is bent to shape on the hot bending tube, I hold it in shape with masking tape until it cools down and holds it shape. In this photo the 'cutaway curves' still need to be bent some more to sharpen up the curves. But with bending you can along progress in small amounts at a time if you are not to snap the wood.

Installing Frets

All frets now installed, just needing to be trimmed of their ends to flush with the fingerboard

Filing of the excess overhang of the frets flush with the fingerboard.

Frets now filed flush with fingerboard

Trimming of the excess width of the neck

The 'mother of pearl' shell from which the headstock inlay will be cut from.

Excavation in the tail of the sides ready for the bottom splice/graft. Note that the back has already been bound with ebony whereas the top has not yet received any binding.

The splice/graft has now been installed and rough sanded. Note the 'bookmatch' pairs of matching side (ie; they are a reflection of each other grain patterns)

Spokeshaving the neck

Rasping the neck

Sanding the neck

Ledge being routered for binding and paua purfling on top edge.

Completed ledge (step) for binding and purfling

Glueing first row of pin-striping in place. Pins are to hold the pin-striping in place whilst the glue is drying.


Inner striped binding in place and outer ebony binding in place. The channel inbetween will be inlayed with paua (abalone).

Paua shell purfling being carefully added to the cavity left by the process described above.

Paua shell inlay on top now completed. Just require final sanding

Guitar shaping up, with fingerboard sitting in position. Note that the fingerboard is only resting and is not yet permanently attached.

Close up of fret dot markers cut from a bull-dog clip.

Fret dot markers glued in position

Fret dot markers completed


Filling the grain pores with filler before final sanding

Roughly shaped bridge and bone saddle blank

Progress on the headstock inlay, being shaped from 'Mother of Pearl' Shell.

Inlay just resting on surface before being inlayed and engraved

Routing out the cavity for the headstock inlay

Completed cavity ready for inlay

Inlay complete. Now only requires engraving and final sanding

Engraving (scratching) the detail into the inlay following around pencil marks. This will later be filled with ink or paint then sanded of flush with the surface.

Filling the engraving scratches with black paint. Excess will be sanded off to leave the engraved detail lines black.

The completion of all the shell inlaying on the guitar. Just some final engraving touchup required to the pearly lady before she is finally sanded and polished.

Gluing on the heel cap

Completion of the neck/body joint

Completed bridge sanded down to 1000grit sandpaper and oiled. Ready to be glued onto guitar top.

Home made clamp for gluing bridge into place. Accuracy along string length has to be within a mm.

Blank saddle and nut ready for shaping from 'old bone'.

Guitar sanded and cleaned ready for spray on lacquer finish.

Critical parts that are not to be lacqueres are masked of before spraying

Fine sanding with 400 grit to 1000 grit wet & dry sand paper using soapy water as a lubricant.

The guitar is now finished. you can see it on this blog site under the post 'Cut-Away Acoustic'
Very interesting timeline Brent and your first blog is progressing nicely as well.
ReplyDeleteChris, Thanks for your comments and interest
DeleteI've had the opportunity, to check and to play Brent's first masterpiece in guitar-making - the 'Pearly Lady'.
ReplyDeleteAs a musician/ guitarist I've owned and played lots of good guitars over the last decades. Brent's guitar is not just an amazing work of art (have a look the craftsmanship)- foremost it is one of the best sounding instruments, I've ever played.
Well done, my friend.
I can't wait to play your next one ... :-)
Best wishes,
Guenter 'Grete' Fischer
www.gretemusic.com
Grete, Thanks for the kind words. Although of course it sounds good to me, you know I can't play guitar so to recieve endorsement from a guitarist as yourself is very humbling....Cheers
DeleteGood one Brent coming along nicely and low-tech as compared to 3D laser printing
ReplyDelete